Saturday, November 2, 2013

Our Blog Has Permanently Moved, COME CHECK IT OUT!

We've MOVED!  
Our new location is www.mommyvegas.com. If you would like to follow Mommy Vegas and the Naptime Gnome, please visit our new site and select one of the many "follow" options. This will allow notifications to be sent when a new post is added!

Not sure if you want to check it out?  Here's a little sample of what we've been up to!
Make your own chalkboard glasses! Complete with FREE conversation starter printable - 48 cards in all!
Find out where this fun (FREE) indoor show is! Oh, this one has a free printable too!

Thanks for visiting Mommy Vegas and the Naptime Gnome, hope to see you around our new site!

Thursday, October 31, 2013

Sunset Stampede at Sam's Town

Lights, Camera... FOUNTAINS! 
It may not be the Bellagio Fountains, but it's indoors, climate controlled, and off the Strip. The rather grand artificial water fall of Mystic Falls at Sam's Town serves as the backdrop for this fun little fountain show.  The choreographed water dances and spurts to a musical score that seams to chronical the emotion of a wild west stampede, complete with dramatic pauses, dynamic eruptions of chaos and the lull that follows, and well, all sorts of fountainy, laser lit, goodness.
It's actually quite impressive as free shows go. Little Bug danced the whole show through, about 10 minutes worth, and tossed her hands to the side as to say "Where'd it go?" once it ended. Our Bear was a little less impressed, but he tends to shy from loud noises, which this show is not short on.
The Old West theme is a must if you have a little cowboy or cowgirl at home. The last time we were there we spotted, not one, but TWO Woodies (Woodys?)! We were at a loss for which was the REAL Woody. Eventually it was agreed that they were indeed pretending to be the Toy Story character, but it took Little Bear MANY attempts at convincing me, I still contend that at least ONE of them was the real deal!  ;)

Be sure to schedule enough time to walk about in the "park" and enjoy the twinkle light lit path and the many critters hiding amid the scene (see the Mommy Vegas Printable (MVP) below.  If you are not familiar with Sam's Town, they have a good size cinema, extensive buffet, ice cream parlor and food court available, so if this is a bit of a drive for you, maybe plan to pair the show with another on-property activity!


The Details
Shows occur daily, starting at 2 PM, followed by showings at 6, 8 and 10 PM. The 2 PM showing seems to be nice for the little guys because it tends to be mostly little people with their families, which equates to fewer huge obstructions in their view (with any luck). If you want to pair your trip with a visit to the movies, arcade, or one of the many eateries, you may opt for the 6 or 8 PM showings. 


You'll hear a wolf howl just prior to the start of the approximately 10 minute show. 

Either before or after make sure you take the time to explore the simulated nature area, complete with animatronic animals. To get a little more out of the experience, print a copy of our MVP kiddle Safari!
Click to enlarge and print!


Getting There
Address
5111 Boulder Highway, Las Vegas, NV
(702) 456-7777
 
Mystic Falls is located in the Atrium of Sam's Town Hotel and Gambling Hall (just about the center of the casino). Sam's Town is on Boulder Highway, just South of Flamingo, between Nellis and Harmon.  

Happy hunting!

-Candice

Sunday, October 27, 2013

Saturday, October 19, 2013

Roos-n-More Zoo

Mommy Vegas Idea #12

Camels, and Monkeys, and Wallabies, OH MY!
Ever wish you could have a pet monkey, or maybe a few kangaroos in the backyard? I sure have, and then I think about the mess... and being that my child labor force is small, both in numbers, and stature, I realize it would be ME... or rather, some anonymous gnome who would get saddled with keep things inhabitable... and think better of it! 
But seriously, wouldn't it be great to have all sorts of awesome critters in the backyard? Well, if it doesn't have to be YOUR backyard, you could!
Roos...
...n-More... Roos!
This isn't your typical backyard, and these aren't your typical pet owners. The Holt Family of Moapa Valley has collected over 150 beautiful animals to share with us, the general public, at their non-profit Roos-N-More Zoo.  The best part, you can feed them, observe them, and even snuggle a few, for only around $10 a person (at the time of posting)!  Ok, maybe that's not the best part... you can do all those things, AND not have to clean up after them, for only around $10 a person! If you DO want to clean up after them, that's free; ask about volunteering! :)

The habitats are well kept, the people and animals are ever so pleasant (those that are allowed to mingle any way... this could apply to the people too, but we're of no authority on that! :), and the experience is unobtainable anywhere else in Southern Nevada.  In fact, on the heels of the Las Vegas Zoo's closure a few weeks ago, you'd have to travel about 300 miles just to smell another binturong, hold a lemur, follow an African spurred tortoise, stare down an eagle owl, hold hands with a capuchin monkey, chat with a cotton-top tamarind, see a cavy, feed a kangaroo or watch a sleeping fennec fox (just to name a few).
shhh.... don't wake him....
My what big ears you have!
The Details
For some time, this warm-hearted family of veterinarians has opened their home to critters of all sorts, but they also welcome private tours by reservation, special events and parties (also by appointment) and public visitations a few times a month.   As they are only open to the public 2 to 3 times a month, we highly recommend checking... and double checking... their website for "Open Zoo Days," and plan your trip accordingly.  Plan to arrive around 9:45 am, as the gates open at 10 am (at the time of posting, so check their website for current hours) and there is quite a line. Also keep in mind that some add-on activities are limited on space, so the earlier the better. 

"Why aren't we ever open on Hump Day?"
The zoo is not huge (which we like for the little guys), but fairly diverse and there are not many places you can get so close and "personal" with so many exotic creatures. There isn't quite as much posted information as I usually like, but it looks like more signage may be in the works. What they lack in printed materials, they make up for in quality manpower. They do a beautiful job keeping plenty of knowledgeable people roving the grounds with critters in hand, answering questions, disseminating knowledge, and guiding animal interactions. If given the choice, I would take the people over signs any day!  If you too like the written word, they have a fun little email newsletter you can signup for on their website!
Don't worry... they don't bite... ;) hard.
The next opportunity to visit on a public zoo day is Sunday, October 20th, but if you're looking for a fun Halloween activity, they will be open on October 27th, from 1 - 5 pm, for a special Halloween themed party of sorts, complete with candy, games (rumored to include the animals!), and even a creepy crawly booth featuring some choice arthropoda! In accordance with all the added festivities, the entrance fee will be $15/person for the afternoon. 
If you'd rather a more intimate experience with the animals and their handlers, you can reserve the zoo for private parties and educational tours for a very reasonable fee! Visit their website for more information!

Getting the Most Out of Your Visit
  • Get there early - They recommend getting there prior to 11:30 am, you'd be hard pressed to see it all before closing time.
  • Splurge on the food - There is no outside food, but you can buy some small food packages for the critters at the gates. The animals aren't slow, they know the difference between and empty hand and a full one. You'll get the most "love" and better pictures if you don't come empty handed!
  • Bring the Camera :)
  • Pack a lunch - While you can't bring food into the park, you'll likely be hungry either mid-visit, or when when you're done, and there isn't a whole lot near by. 
  • Visit the little house in the center of the property, you'll not only meet a gorgeous little sloth, but you could hold a monkey or a wallaby joey, or who know what else! There is also a gift shop, and restrooms too!
  • Have your money ready at the gate. They do a great job announcing pricing and available add-ons before opening. Figure out how much your admission will be while in line and have your money ready!  The line can be quite long, and while they are fairly efficient and keep the line moving, you can help by making your turn to pay a speedy one! The sooner you get in the sooner you can play!
Add-On Experiences: There are several add-on experiences you can purchase at the gate and space is limited, so if you think you may want to try one, be sure to purchase them at the gate.  

Walking with the otters is going on right now. There is plenty to see and do without this add-on. But if you have some diehard otter fans, you may want to splurge, otherwise, you're not likely to see otters at all. 

The roo experience add-on is cute, but may not be worth it for most families (particularly bigger familes). You get rather close to the kangaroos, wallabies and cavies just by observing them through the fence, and there are even opportunities to feed and pet them. But if you really want the chance to sit next to a wallaby or really get close, you can pay a few more bucks to enter the enclosure with a guide. 

Want to see even more?! Schedule a party or tour! This is truly an unbeatable value!
 
Getting There
Address
746 Snowden Ranch Road
Moapa Town, NV 89025

WHOOO wants to visit the Roos-N-More Zoo?
Estimated Drive Time: About 40 minutes from the edge of town.

Don't let the address spook you, the drive goes pretty fast, but it is a great idea to carpool!  We had a wonderful time with our friends the Midnight Gnome and her hubby the Photo Gnome (great place to snap some pics by they way! I can see the Christmas cards now...*Mom, Dad, the little ones and a Joey... *-Caption: Merry Christmas to Roo and a Hoppy New Year! Too corny? ;)

General Directions:
Follow me! We'll be there in no time!
To get there from Vegas:
  • Take I-15 Northbound, head out of town towards Mesquite/St. George, Utah. 
  • Take Exit 90, SR168/Moapa Valley
  • Merge onto 168W you'll soon see "ZOO" signs marking the way. 
  • Turn right on N Henrie Rd (just after the school). 
  • Turn right on Isola Dr.
  • Then your first left onto Sandy D., continue onto Snowden Ranch Rd. and you're in the parking area!
The parking lot fills up pretty quick, so don't dilly dally too long getting up there!
Have a great time and let us know about your visit!

Happy zooing!
-Candice


Can you believe they feed zonkey's live goat? Good, don't believe that... he just climbed in. I can't decide which is cooler, the fact that they have a zonkey, or that they have a goat cleaver enough to camp out in the feed trough!


Friday, October 18, 2013

3rd Week of Christmas - Wood Candy Dish

Naptime Gnome Idea #9

Custom Candy Dish

Why is it so hard to find the perfect gifts for the ones we love most and know the best? I always find it harder to think up things to make for my husband than anyone else. Luckily, he has a passion for Iowa Football. So I can slap a hawkeye on just about anything and come up with a  somewhat serviceable gift, but this one was such a hit he started coming home reporting special orders! Thankfully, they're not terribly difficult if you have a few tools.  So I thought I'd share!

These simple candy dishes are made from two sheets of wood.  By cutting either recesses or raised portions on a top board and gluing them onto a backer, you can produce a custom piece in about 3 naptimes (accounting for dry times).

NOTE: This project is actually fairly easy, but it does require the use of a scroll saw (or bandsaw). If you have one hiding in the garage or shop and you've never used it, we need to talk! If you can trace and/or sew, and have had any safety training on tools what-so-ever, you will have no problem with this simple, but stunning project.  That being said, all tools are accompanied by inherent risks, if you have not been trained to use your saws, be sure to get proper training before starting any project.  If you are still new to power tools, you may want to start with a very simple design.  No matter what your skill level, make sure to wear protective eye wear and be observant of basic shop safety.
 
Quick and Dirty Run-Down
  • Select a design with chunky details so you can easily single out a few recesses, like the hawkeye above, or you can raise the pattern and use the background to house treats, like this:
  • You'll want to make sure that your pattern is at least large enough to manipulate the wood easily (the lettering above was a bit of a bear, and I wouldn't recommend it if you are not particularly comfortable with your saw. When considering your design, you also want to make sure all recesses are wide enough to accommodate your sweet little morsels. For example, this dish's size was completely predicated on the dimension between the G and the yellow perimeter in order to fit M&M's without them getting stuck: 
  • Once you've determined your desired design, print or draw to scale (between 6 and 10 inches seems to be a nice size), then glue to one of the boards with spray adhesive (in this case I just used a pine board from Lowe's, but you can use virtually anything you like) . 
  • If using a scroll saw (preferred): Use a drill-bit large enough to produce holes to allow passage of your saw blade, drill a hole in each of the desired cutouts (the hawkeye required 4 holes).  Remove your saw blade from the saw, pass it through a hole and reattached to your saw.  Repeat with all the recesses. DO NOT cut around the outer edge yet!
  • If using a band saw: make a small cut into one of the recesses, once cut out completely, make a small cut into the next recess, cut out completely, and so forth. Once you are done, you will need to fill the cuts between the recesses with wood putty. DO NOT cut around the outer edge yet!
  •  Sand to desired smoothness. 
  •  Paint or stain all the pieces while they are still separate. 
  •  Designate where the pieces will lie on the second board (backing), trace with a pencil. 
  •  Sand the portion of the wood you'll be using (portion within outermost trace mark).
  •  Stain or paint the portion of the backer board that will be part of the candy dish. 
    •  NOTE: You will want to paint all the pieces prior to assembly to achieve a crisp, manicured finished product. Painting them separately will also help prevent bleeding of colors between the pieces. 
  •  Once all the pieces are dry, use wood glue to adhere the upper pieces to the backer board. 
  •  Once the glue is dry, cut out the outer perimeter of both pieces. 
  •  Paint the outer edge.
  •  Clear coat with a food-safe finishing product. Spray acrylic works great. I also like pourable polyurethane products for this project. I've had questions regarding the safety of polyurethane: as long as you make sure it is COMPLETELY polymerized (dry to the point of being "plastic," with no residual carrier solvents) before using, it is food-safe... just don't drink the stuff ;)
This was my very first bowl, I hadn't worked out the particulars yet, and cut the two pieces separately, then glued them together. This was an inferior technique to that used later, which was to cut the outer edge with the two pieces already glued, giving a much more uniform outer edge.

ENJOY!
-The Naptime Gnome <;')


Wednesday, October 16, 2013

Wetlands Park - Nearly 3,000 Acres of AMAZING!

Mommy Vegas Idea #11

Come and Play a World Away!
Can you identify this city? At first glance, this picture looks like it could have been taken somewhere around Seattle, maybe even the Midwest, but look close! That's not the Space Needle... wait a minute... WHERE IS THIS? Is that the Wynn... and the Stratosphere?!
So where were these photos taken? If you're struggling to answer, without reading the post heading ;), you need to get out more... to the Wetlands Park!  This beautiful little garden spot at the business end of the Las Vegas Wash has long been a gem in the Mojave Desert, but the recent additions of more trails and the truly breathtaking Nature Center have made this pretty little place to hike and jog a standalone destination.
I remember jogging around on dusty trails thinking it was fantastic.  A beautiful little nature sanctuary amid the hustle and bustle.  The tranquility is still front and center (of course we will always have to listen past the aircraft buzzing by, unfortunately it lies in the flight path of more than just a few dozen types of migratory birds!), but now the jogging stroller glides smoothly along hardscape (worry not, there are still oodles of dirt and gravel trails about), and the little visitors' center has blossomed from a porta-potty alongside a tiny modular, into a 45,000 sqft. multi-purpose LEED (Leader in Energy and Environmental  Design) Gold Standard (that's architect speak for uber, uber, uber "green" - there's only one more available "uber") complex. It's a whole lot more than you would expect from a completely free venue.

I don't even know where to begin to describe this fantastic place, we should just stop here. GO, hop in your car, drive down there and check it out! Ok, you win, that's not terribly practical, who knows what you could be wearing! While I'm inclined to jump right into the core of the experience, THE TRAILS, I really think there is some great benefit to starting and ending your adventure (at least your first visit) with a trip to the NEW Nature Center.

The Nature Center
The new 45,000 sqft. visitors' complex is open from 9 am - 3 pm and includes a beautiful 8,333 sqft. exhibit hall, an auditorium that seats 85, state of the art restrooms (oooh, aaaah), and rumor has it there will also be a cafe AND a nature store in the not too distant future! Possibly the best part: at this point, it's all FREE!

This gorgeous new command center is simply amazing! You could spend hours just exploring the interactive exhibits... in fact we have, but most families could probably budget about 30 min to an hour to get their fill.
At first glance, the exhibit hall does not appear to be terribly large, in fact we observed several families, come in, look around the lobby for a moment, and turn to leave as if there was not enough to occupy them.  But don't be fooled, just around the bend there are so many flaps to flip, facts to read, animals to meet, videos to watch, demonstrations to explore, scents to smell, pelts to pet... well you get the idea... that you really should take a spin through the entire exhibition, at least once, if not again and again.


Don't forget to talk to the helpful staff, many of whom are volunteers. They are, in our experience, quite knowledgeable, exceedingly friendly, and eager to share in your experiences and their own (SO REFRESHING!).  So be sure to unload all your questions before, and after, you experience the trails.

*AMAZING IDEA ALERT* One of my favorite amenities at the park has absolutely nothing to do with the structures, except that it can be found in one! Before you leave the Visitor's Center, be sure to check out this fantastic little number! The "Family Backpack" is simply chuck FULL of fun little items to explore and aid in your exploration!
In exchange for some meager collateral, you can borrow this FANTASTIC(!) and AMAZING(!) exploration pack which includes binoculars, a thermometer, a magnifying glass, all sorts of reference materials, activities and scavenger hunts, and the list goes on!  You provide the sun-screen, water, hat and sturdy shoes, and you're set for your grand adventure on the trails!

Just be back in time to retrieve your driver's license and return the pack before the 3 PM closing time! :) I can only imagine the shear elation this explorer pack would elicit from a Dora the Explorer fanatic!

Once you've wet your palate in the Nature Center, make sure you have plenty of time budgeted for the main course! 
 
The Trails
Map of the trails in the Exhibit Hall of the Nature Center... conveniently located under Little Bear's Finger.
You could truly spend days exploring the extensive trails amid this nearly 3,000 acre wonderland, both in the preserve portion and adjacent, across the Las Vegas Wash (accessible via Weir Bridge), but you'll have to take a break, as the park is only open between dawn and dusk.
The Wetlands is one of the few places in our desert where you (and your kiddlets) can weave through tall reeds, mesquite groves, and broad-leaf plants. As you wander along the winding paths, be sure to really take it all in. You will see, hear, and smell many amazing organisms that tend to congregate near water. You're likely to see all sorts of critters.  Birds are especially prevalent, from water fowl to road runners; the park is particularly popular, among the migratory bunch, in Fall and Spring. There are also plenty of amphibians, reptiles, mammals, and invertebrates to keep the little ones busy "hunting."
On the other side of the bridge spanning the Las Vegas Wash (Weir Bridge), you'll find even more trails - great for jogging and biking, some are even open to horseback riding.
Be cognizant of the signage, you will see various indications of intended use and other important postings meant to keep the park at its best and your family safe. These fancy little numbers (below) are some of my favorites.  If you come across any, see if your little ones can guess what the symbols represent.

Activities and Programming
If the place wasn't wonderful enough, the amazing people that make it all happen have gone and made if even better with plenty of programs and classes, many of which are free to the public! Space is often limited though, so be sure to RSVP.  I already have a Nature Tykes post in the hopper, so stay tuned to learn more about this and other fun events scheduled at the park, but in the mean time, here are a few programs worth checking out:
Call or visit http://tykes.eventbrite.com to register!
For more information and to register for these fun themed, family friendly hikes, go to http://hikes.eventbrite.com
Cafe Coming Soon
Threats of a Cafe are clearly posted on the premises! I can assure you there will be a post the moment I hear of its opening!  I've never fancied myself a food critic, but I will jubilantly rise to the occasion for this one, assuming the food is good.  My parents always taught me to keep my negative comments to myself, but with the standard set at the rest of the park, I have no reason to doubt you will have a glowing report to read!

Play Area
The children's play area on the edge of the park is great, but not what I would consider a standalone draw. This is a cute little park, particularly if you live close enough to walk.
The traversing climbing wall is fun, and there are some fun photo opportunities with the larger than life critters and gargantuan Apache/Moqui Marble and other faux formations.

Getting There and Other Details

Address and Contact
7050 Wetlands Park Ln, Las Vegas, NV
(702) 455-7522

HOURS: Trails - Dawn until Dusk
Nature Center - 9 am - 3 pm
 
Visit the MOMMY VEGAS MAP

The Wetlands Park is located on Wetlands Park Ln., just off Tropicana, approximately 1 mile East of Boulder Highway.  Simply follow Trop until you see a fairly severe bend in the road a few blocks past the Boulder Highway Intersection.  Turn on the left turn signal, and hop on to this little side street (Wetlands Park Ln.). It can be a bit easy to miss, but thankfully there's a pretty good size sign.
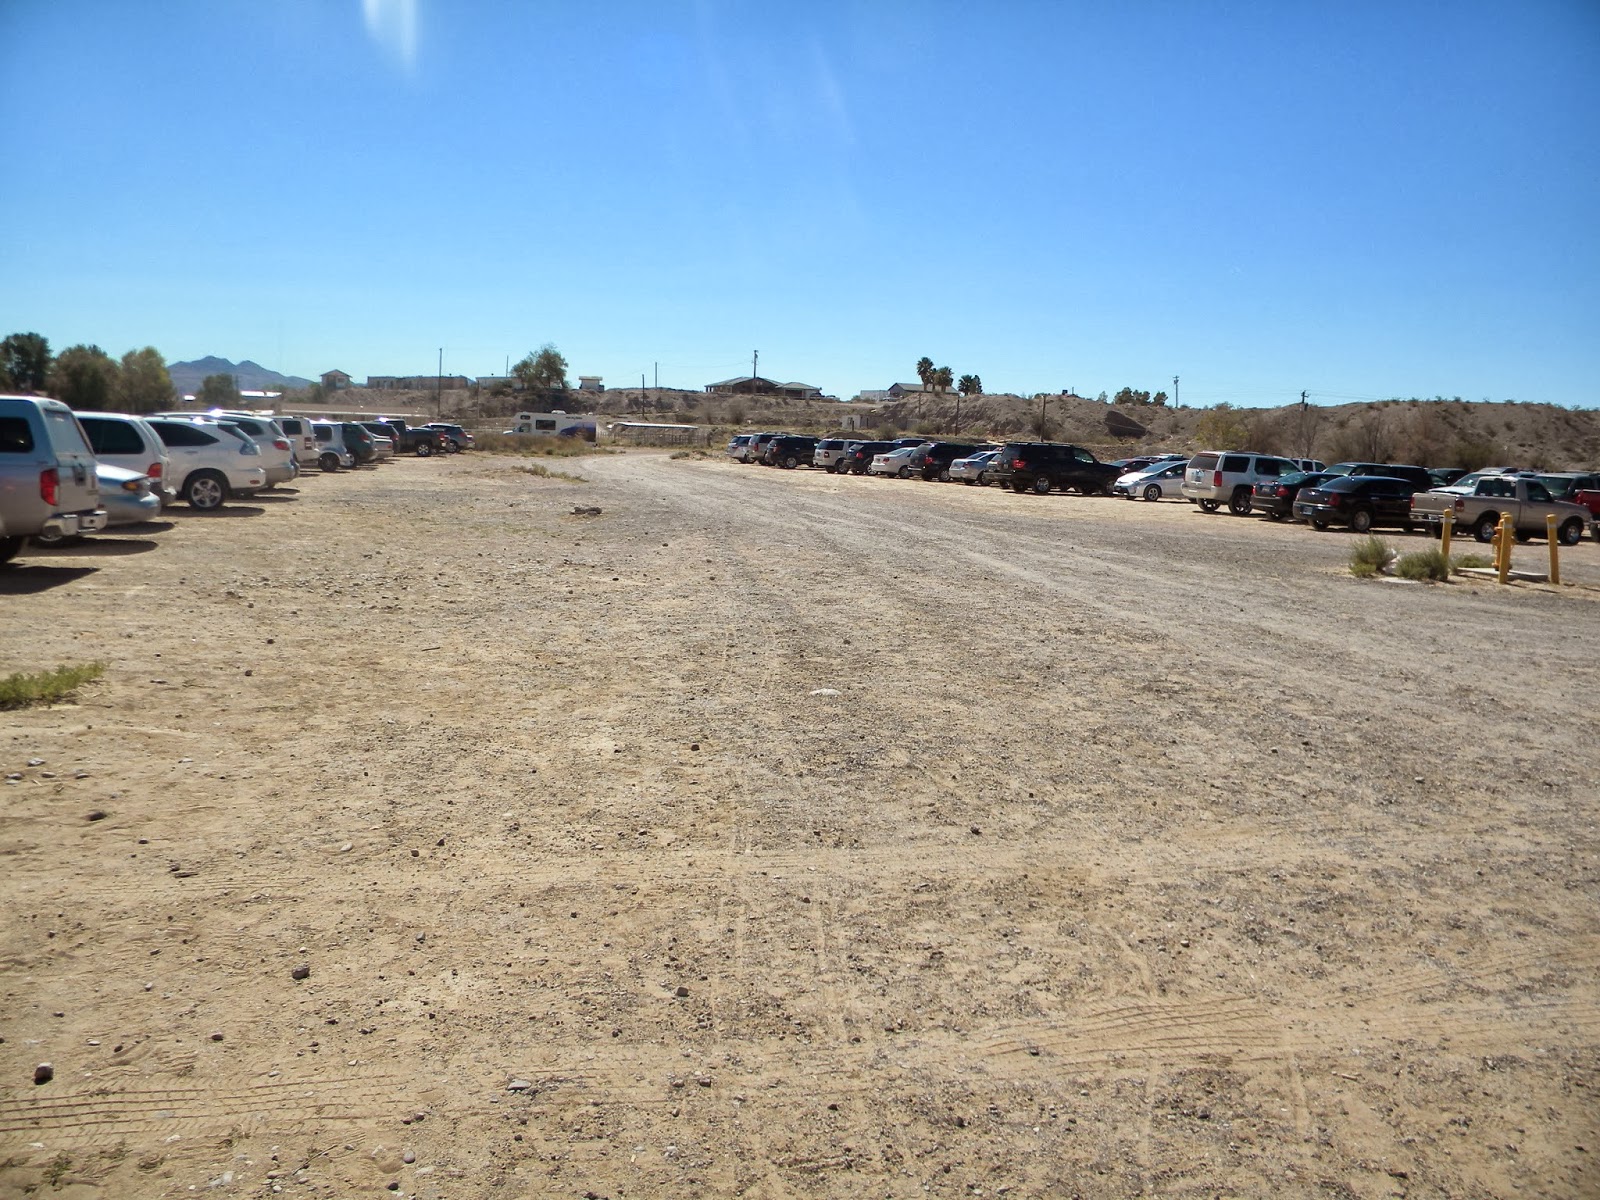
There are two parking options: you can either park near the play area on the left (the old parking lot for the park, near the original visitor's center), or you can continue on down the road to the gorgeous new visitor's center which has oodles of parking comparatively.

Happy Exploring!
-Candice

For more information and to reference the source of the park specs discussed herein, please refer to the following Park Dedication :

Friday, October 11, 2013

The 2nd Week of Christmas - Little Girl's Petalled Jewelry Box

Naptime Gnome Idea #8

Silk Flower Petal Jewelry Box

This super simple decorated box can be done in just a couple naptimes with oodles of time to spare (unfortunately it needs time to dry ;)!

What you need:
  • Unfinished wooden box of your choice
  • Paint (Acrylic or spray are fine)
  • Faux Flower Petals (available in wedding section of craft stores and Wal-mart)
  • Glue (crafting glue, hot glue, your favorite sub-industrial glue...)
  • A bit of ribbon (optional, but a nice finishing touch)
  • Trinkets for embellishing
The Quick and Dirty Run-Down
Just paint a pre-fab wooden box (available for a few bucks at just about any craft store, Micheal's usually has several sizes for under $10). I used alternating opalescent- red and white acrylic brushed with the grain to get this pearly pink, then sprayed with clear coat. 

You can wrap the edge of the lid in ribbon and affix with craft glue if you like (optional). Then add artificial rose petals, starting around the outer edge of the box top.  Work your way in towards the middle, gluing one petal at a time (I used a tacky craft glue, but you could use hot glue or your sticky substance of choice).

Once you have covered the top, place a gem, charm, stone or even a pretty button in the center to cover the exposed bases of the petals. I used a pearlescent glass pebble (like the ones you put in a fishbowl), and glued four more to the base as "feet." 

When you're done, the top should look a bit like this:

Decorate the inside however you like. Stock with treasures of your choice. Package ever-so-charmingly and stash away in a MEMORABLE location (I'm not unlike a squirrel, in that I occasionally forget my caches... luckily they're just as fun to give the following year... usually). Oh, and the last step: Wait with butterflies of anticipation for the special moment when it pops open for the first time! 
 
PSST... 2013 Christmas Spoiler Alert: Don't tell, but Little Bug will be receiving her first jewelry box, much like this one, stocked with bobbles this year! *So excited I can hardly stand myself!*

ENJOY!
-The Naptime Gnome <;')