Showing posts with label Home Decor. Show all posts

Friday, October 18, 2013

3rd Week of Christmas - Wood Candy Dish

Naptime Gnome Idea #9

Custom Candy Dish

Why is it so hard to find the perfect gifts for the ones we love most and know the best? I always find it harder to think up things to make for my husband than anyone else. Luckily, he has a passion for Iowa Football. So I can slap a hawkeye on just about anything and come up with a  somewhat serviceable gift, but this one was such a hit he started coming home reporting special orders! Thankfully, they're not terribly difficult if you have a few tools.  So I thought I'd share!

These simple candy dishes are made from two sheets of wood.  By cutting either recesses or raised portions on a top board and gluing them onto a backer, you can produce a custom piece in about 3 naptimes (accounting for dry times).

NOTE: This project is actually fairly easy, but it does require the use of a scroll saw (or bandsaw). If you have one hiding in the garage or shop and you've never used it, we need to talk! If you can trace and/or sew, and have had any safety training on tools what-so-ever, you will have no problem with this simple, but stunning project.  That being said, all tools are accompanied by inherent risks, if you have not been trained to use your saws, be sure to get proper training before starting any project.  If you are still new to power tools, you may want to start with a very simple design.  No matter what your skill level, make sure to wear protective eye wear and be observant of basic shop safety.
 
Quick and Dirty Run-Down
  • Select a design with chunky details so you can easily single out a few recesses, like the hawkeye above, or you can raise the pattern and use the background to house treats, like this:
  • You'll want to make sure that your pattern is at least large enough to manipulate the wood easily (the lettering above was a bit of a bear, and I wouldn't recommend it if you are not particularly comfortable with your saw. When considering your design, you also want to make sure all recesses are wide enough to accommodate your sweet little morsels. For example, this dish's size was completely predicated on the dimension between the G and the yellow perimeter in order to fit M&M's without them getting stuck: 
  • Once you've determined your desired design, print or draw to scale (between 6 and 10 inches seems to be a nice size), then glue to one of the boards with spray adhesive (in this case I just used a pine board from Lowe's, but you can use virtually anything you like) . 
  • If using a scroll saw (preferred): Use a drill-bit large enough to produce holes to allow passage of your saw blade, drill a hole in each of the desired cutouts (the hawkeye required 4 holes).  Remove your saw blade from the saw, pass it through a hole and reattached to your saw.  Repeat with all the recesses. DO NOT cut around the outer edge yet!
  • If using a band saw: make a small cut into one of the recesses, once cut out completely, make a small cut into the next recess, cut out completely, and so forth. Once you are done, you will need to fill the cuts between the recesses with wood putty. DO NOT cut around the outer edge yet!
  •  Sand to desired smoothness. 
  •  Paint or stain all the pieces while they are still separate. 
  •  Designate where the pieces will lie on the second board (backing), trace with a pencil. 
  •  Sand the portion of the wood you'll be using (portion within outermost trace mark).
  •  Stain or paint the portion of the backer board that will be part of the candy dish. 
    •  NOTE: You will want to paint all the pieces prior to assembly to achieve a crisp, manicured finished product. Painting them separately will also help prevent bleeding of colors between the pieces. 
  •  Once all the pieces are dry, use wood glue to adhere the upper pieces to the backer board. 
  •  Once the glue is dry, cut out the outer perimeter of both pieces. 
  •  Paint the outer edge.
  •  Clear coat with a food-safe finishing product. Spray acrylic works great. I also like pourable polyurethane products for this project. I've had questions regarding the safety of polyurethane: as long as you make sure it is COMPLETELY polymerized (dry to the point of being "plastic," with no residual carrier solvents) before using, it is food-safe... just don't drink the stuff ;)
This was my very first bowl, I hadn't worked out the particulars yet, and cut the two pieces separately, then glued them together. This was an inferior technique to that used later, which was to cut the outer edge with the two pieces already glued, giving a much more uniform outer edge.

ENJOY!
-The Naptime Gnome <;')


Friday, October 11, 2013

The 2nd Week of Christmas - Little Girl's Petalled Jewelry Box

Naptime Gnome Idea #8

Silk Flower Petal Jewelry Box

This super simple decorated box can be done in just a couple naptimes with oodles of time to spare (unfortunately it needs time to dry ;)!

What you need:
  • Unfinished wooden box of your choice
  • Paint (Acrylic or spray are fine)
  • Faux Flower Petals (available in wedding section of craft stores and Wal-mart)
  • Glue (crafting glue, hot glue, your favorite sub-industrial glue...)
  • A bit of ribbon (optional, but a nice finishing touch)
  • Trinkets for embellishing
The Quick and Dirty Run-Down
Just paint a pre-fab wooden box (available for a few bucks at just about any craft store, Micheal's usually has several sizes for under $10). I used alternating opalescent- red and white acrylic brushed with the grain to get this pearly pink, then sprayed with clear coat. 

You can wrap the edge of the lid in ribbon and affix with craft glue if you like (optional). Then add artificial rose petals, starting around the outer edge of the box top.  Work your way in towards the middle, gluing one petal at a time (I used a tacky craft glue, but you could use hot glue or your sticky substance of choice).

Once you have covered the top, place a gem, charm, stone or even a pretty button in the center to cover the exposed bases of the petals. I used a pearlescent glass pebble (like the ones you put in a fishbowl), and glued four more to the base as "feet." 

When you're done, the top should look a bit like this:

Decorate the inside however you like. Stock with treasures of your choice. Package ever-so-charmingly and stash away in a MEMORABLE location (I'm not unlike a squirrel, in that I occasionally forget my caches... luckily they're just as fun to give the following year... usually). Oh, and the last step: Wait with butterflies of anticipation for the special moment when it pops open for the first time! 
 
PSST... 2013 Christmas Spoiler Alert: Don't tell, but Little Bug will be receiving her first jewelry box, much like this one, stocked with bobbles this year! *So excited I can hardly stand myself!*

ENJOY!
-The Naptime Gnome <;')

Friday, September 20, 2013

No-Sew, Kid-Friendly Table Runner in 30 Minutes or Less

Naptime Gnome Idea #6

Don't throw away the trimmed ends of pull shades! Re-purpose! 

Two dilemmas needed fixing: 
  1. We needed a kid-proof runner to cover the seam in our packing paper "table cloth"
  2. There were some several-year-old trimmed ends of window shades that needed to vacate the craft space
Solution:
A wipe-clean table runner made from castoff window pull-shade scraps

NOTE: You could do the same thing with any spare scraps of vinyl or paper. 

DIY Paper Punch Vinyl Table Runner
Crafty Gnomes: 1

Time to Complete: 1 naptime with time to spare!
Supplies and Tools
  • Vinyl pull-shade trimmed end
-Any kind of narrow scrap vinyl or paper will work.
-This same technique on butcher paper would make a pretty lacy table covering for a girls' tea party, don't forget to set the table with a Crayon Bouquet (see tutorial)!
  • Scissors
  • Paper punch or decorative shears
 
Measuring your runner
1. Determine your desired length and width for your runner and cut with scissors to fit. This scrap vinyl was 13" wide, which was perfect, then I just rolled it out over the table and cut off enough that it hung over about a foot on either side.

2. Starting on one end, begin punching the edge of the runner. If you are using shears rather than a punch, be sure to remain consistent in the amount of material you are removing. You may consider drawing a faint pencil line 1/4" from the edge to follow along to keep your runner's edge straight.

The punch I chose had guides to line up the pattern after each new punch, this ensures a consistent pattern and even edge.
 3. Repeat on the other side. Be sure to keep whichever side you would like to be the top facing up. Some punches emboss the edges slightly, flipping the vinyl over will result in the two edges looking mismatched.

4. If you are going to punch the ends too, you will need to trim the pattern so your design will flow on the corners. I opted to leave my ends straight.

5. If you are not punching the ends, you may need to trim them so you have a complete pattern (you don't want half of a scallop or just a bit of a flower at the end.

6. Inspect your design for any obvious flaws or hanging tags. Carefully trim with sharp scissors.

7. If your material was rolled, it may need smoothing. It was hot enough here to "iron" it with the heat from the sun. Spread it out on a relatively clean/dry surface, we have artificial lawn, but a patio, chaise lounge, or even a kid's slide will work great. Then smooth out the creases, let sit for about 10 minutes and smooth again.  If it's cool, wet, or both, spread out your runner and blow lightly with a hair drier, be careful that it doesn't get too hot... you don't want to burn yourself or melt your runner onto anything!


8. Smooth over your table... step back and enjoy your masterpiece.
 
9.  Throw a paper table cloth down under your runner and make a Crayon Bouquet to go with it! (Optional <;')

Other Ideas
  •  No paper punch on hand? Here are some other edge ideas, noticed some worked better than others, so do a practice run with a bit of scrap first.

  • Not crazy about table runners? Consider making a set of place mats instead!
  • If you have a house full of windows worth of shade trimmings, consider making runners or place mats for holiday presents, or make a few and keep on hand for housewarming, hostess, or random "I-Love-You" presents.

ENJOY!

The Naptime Gnome <;')

Monday, September 16, 2013

Crayon Bouquet, Girl's Tea Center Piece

Naptime Gnome Idea #4

Make a fun and easy center piece for your next kid-tastic party!

Inspired by the prissy pens at the bank, all gussied up in an attempt to make them harder to pocket, the Gnome fired this out for our annual Mad Hatter Tea Party a couple years ago, but it comes back out all the time because the kids LOVE it. It's required quite a few replacement flowers as they tend to get given away to very attached and enamored little ladies. The kiddles had it out the other day while some friends were visiting.  After some spirited demands for one of their own, it occurred to me that some house gnomes may appreciate some direction on planting crayon flowers.  I'm thinking of "growing" one that matches our kitchen decor to just leave on the table.


Faux Flower Crayon Flower Pot
Crafty Gnomes: 1
 (See the Crafty Gnome Key)
Approximate Cost: <$5
Time to Complete: 1 naptime
Supplies and Tools
  • Crayons
  • Wire cutter (needle nose pliers or old scissors are fine)
  • Green floral tape
  • Scotch tape (optional)
  • Container to hold your bouquet (flower pot, small pail, plastic vase, you get the idea! <;)
  • Ribbon to decorate your container (optional)


Gather Your Materials
Special note on this one, particularly if you're making more than one...
  • Try to use things you already have, like lightly used crayons, bits of ribbons from past gifts, containers in which you've received arrangements in the past, faux flowers you've come across that are maybe a bit too fake to use for anything fancy, etc. 
  • The dollar store often has bouquets for cheap, and they tend to carry floral tape as well. I've purchased it at both the Dollar Tree and the 99¢ Only Store. Oh, and you don't need much, a roll will make OODLES AND OODLES of flower crayons.
Prepping Flowers
1. Just like when you prep real flowers for arrangement, you'll want to thin out the greenery. Maybe leave the leaves <:-) closest to the bloom and removed the rest. You will also want to pull off any small parts, particularly if you have any bitty guests that may be inspired to color. 


2. Using wire cutters (or some other cutting implement you really don't care about much), trim the stems so they are long enough to wrap around the crayon once or twice loosely.


Affixing Flowers to Crayons

3. Wrap the stem around the crayon, bending the wire to conform. Take care to not break the crayon. If you are in a rush, this step isn't imperative, but it will improve the longevity of your work, particularly if you plan on using them often.


4. Wrap a bit of Scotch tape around the crayon and the base of the stem, and another length around the end of the crayon closest to the flower, this will also add some durability so the stems are not simply ripped from the floral tape added in the next step. Again, if you are in a rush, and they don't have to hold up, you can skip this step.

 Wrapping
 5. Starting at the flower end of the crayon (top?), begin snugly wrapping the floral tape around both the crayon and flower stem, working your way down the crayon (imagine the spiral stripes of a candy cane and "follow" them).

NOTE: You do not necessarily have to start wrapping near the flower, but you should definitely finish the wrap near the flower so the end of the tap is not where you would hold the crayon.


6. Once you've reached the end of the crayon wrapper, begin wrapping back up towards the flower.

7. Once you've reached the place you started wrapping, you can repeat the wrapping process a few more times to make sure the flower isn't going anywhere.

8. Because ours get A LOT of love and I usually have several rolls of cheapy paper floral tape on hand, they are wrapped down-and-back, 3 times. But I've tried both once and twice, and they are perfectly serviceable.  With the plasticized floral tape, you only need to make one "lap."


9. When you are satisfied with your wrap job, simply tear (or cut if using sturdier plastic tape) and wrap the end around snugly.


10. Press the tape end snugly with a wiping motion over the end to secure it.


11. Repeat for all the crayons. With this arrangement I used the same color crayons as flowers. The leave are attached to various green crayons.

12. Decorate your container as you desire and insert your "flowers."

ENJOY!

 The Naptime Gnome <;')

Crafty Gnome Key

1 Crafty Gnome = Simple cutting, gluing, tracing, and/or painting, etc.
2 Crafty Gnomes = Any of the above, plus the use of a few tools, and may involve a sewing machine for some simple seams... nothing crazy.
3 Crafty Gnomes = Could require some practice with any of the above items, and/or could involve power tools (you'll meet Burly Gnome soon enough)
4 Crafty Gnomes = Includes most or all of the above... A bear of a project or requires a bit of help.
5 Crafty Gnomes = Perhaps a bit sorry I attempted it.

Tuesday, August 27, 2013

DIY Fabric Covered Label Windows

Naptime Gnome Idea #2

Add a Custom Fabric Label Window to Just About Anything!


The gnomes responsible for cleaning-up around here all really appreciate labels!  For some reason, even when everyone knows the rightful home of various household items, things have a much higher likelihood of ending up in their homes, if a label is involved.  Thus, freeing up more time for the clean-up gnomes!  As I double as a clean-up gnome, I am particularly fond of these handy little devices. The best kind of labels are those that can be changed at will, with little hassle. This makes chalkboards really high on my list of awesome decorating tools, but the clean lines of label windows are right up there!  

Here are some label windows, hard at work, in the "mud room" portion of the new laundry room remodel. 

You won't be hard pressed to find all sorts of baskets, folders and various other organizers adorned with these household helpers, but what about adding them to your own projects, or items you already have?  Here is a quick (honest, they really don't take long, the tutorial is just very thorough to account for various skill/experience levels), easy way to make label windows with items you probably already have in your home.  

These windows were custom made for the little bear's new backpack. We wanted a way to minimize the bulk of his preschool pack, while increasing the functionality... this is code for "make sure nothing gets lost on the way to teacher/show and tell or back home again." Enter Naptime Gnome with one-of-a kind "folder pack," complete with labelled pockets. 

So grab a cup of your favorite warm and snugly beverage and join us for some label making!


DIY Label Windows
Crafty Gnomes: 2, for minimal sewing skill
 (See the Crafty Gnome Key Below)
Note: If you don't have a machine, 
you could definitely glue them 
using fabric glue or fusible tape.
Time to Complete: 1 naptime to make 3-5 (possibly more if you're quick, or they are super sleepy!)
Supplies and Tools
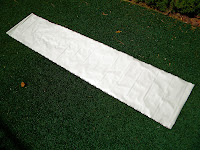
  • Old jeans or other denim/stiff canvas material (cut-off legs from shorts, or old bits of canvas drop-cloth are great)
  • Fabric to cover (here I used a felt backed vinyl tablecloth)
  • Coordinating thread
  • Scissors
  • Ruler
  • Straight pins
  • Paper for labels 
  • Printer for printing labels (if your handwriting looks anything like mine!:) Optional
 
 Making the Denim Form
    1. Cut a rectangle of canvas about as large as the window you would like to make. About 3.5" x 2.5" is pretty standard. I went 3.25" x 2.25" because I wanted them to be a little smaller to better fit a wee-one's world.


    2. Fold in half (either landscape or portrait, doesn't matter). Measure the width you would like the edge of the window to be (these are 1/2" frames). Remember, that once you wrap the denim with fabric, it will be slightly wider, but the difference is only about 1/16" - 1/8" of an inch.  Keeping the frame folded, mark the inner edge of the frame. Using three straight cuts, cut the upper, then lower line, then remove the center by cutting the third edge between them.

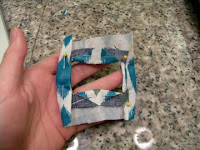
    3. When you unfold the fabric, you should have a relatively symmetrical, rectangular frame. Trim any frays or wavy edges.


    Preparing the Cover Fabric
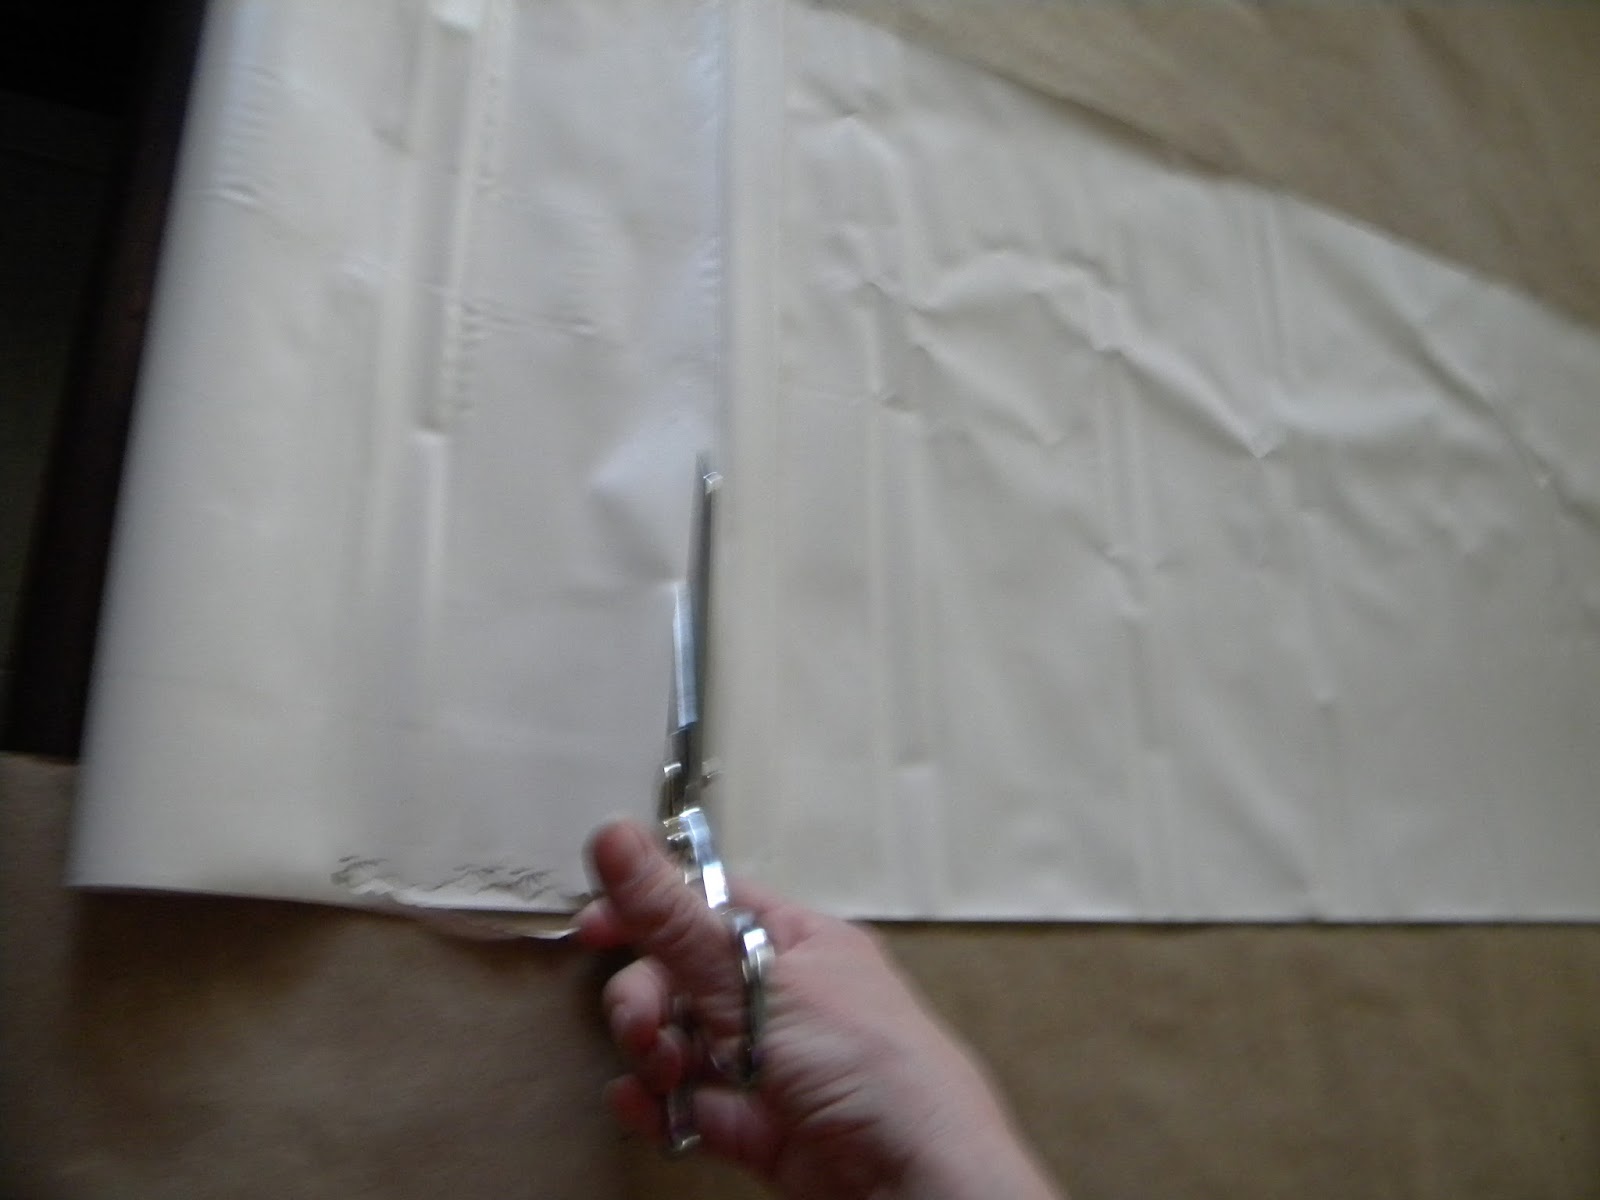
    4. Place your frame on your cover fabric and measure approximately 1/5" out from the form, on all four sides. Mark and cut.

    5. Mark the approximate center and inner corners with small dots. These will be your guides for cutting the inner portion of your cover fabric to make the "window." I used dry-erase marker on this vinyl. You can use a pattern marker/pencil or a sliver of soap if using a darker fabric.

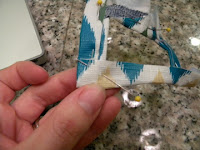
    6. Fold the cover fabric diagonally and bite into it at a perpendicular angle with your scissors. This should be the beginning of your slit from the opposite or diagonally oriented marks. Carefully extend your cut to the dots on either side.

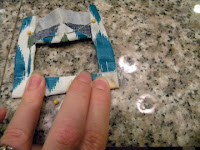
    7. Insert the scissors halfway down the diagonal slit and cut to the remaining dots on either side, making an "X." NOTE: DO NOT CUT BEYOND THE MARK. If you cut too far, the frame will be exposed underneath. You can always snip a bit more if you need to, but "you may never come back" (and if you didn't hear that ethereal echo in the background, you may have to rent the movie "All Dogs Go to Heaven."

    Wrapping the Denim Form 
    8. Now it's time to get our wrap on. :) Place the cover face down and position the denim form with the "X" peeking through the window.

    9. Pull the triangular cut flaps up and outward to wrap the inner perimeter of the frame. Pin and repeat with each triangular flap. Flip over and inspect the corners, if the frame is fairly well covered... GREAT JOB! If any flaps look a bit loose, or the inner edges look uneven, one at a time, unpin the offending flaps, reposition, pin and continue.

    10. Trim the portions of the wrapped flaps that exceed the denim frame. This will reduce the bulk when your wrap the outer edge.


    11. Fold the flaps in to cover the outer perimeter of the form. If you are using a fabric that can be safely ironed, this would be an excellent place to whip out the iron, and simply press the folds as you make them to keep them crisp.

    My vinyl would have shriveled into a little charred ball, so it took a little more effort to keep the edges looking crisp. To get nice square corners, I tried "gift wrapping" by making little triangular folds, but only resulted in bulky rounded corners. Ultimately, it was easiest to fold the flaps in on either side and pin.

    THEN, doing the bottom and top, being careful to keep the folds tucked in. The next few steps outline this technique more clearly. So if you have clean corners, just skip to step 12.


    11a. Fold the bottom (or top if you desire) flap, by first pinching the fold so the fabric doesn't slide diagonally, then fold it directly up (or down if doing the top).


    11b. Pin the corner in place, temporarily.


    11c. Then smooth out the flap and pinch the other corner fold and pull up to pin, being careful to keep the fold tucked in. Repeat for the last flap.


    Stitch Into Place
    12. Using your desired thread, top-stitch in place by sewing first around the outer edge. This makes it safe to remove your pins as you go, as the tips of your inner flaps should extend to your stitch. Then stitch your inner edge.  I chose to stitch use an 1/8" margin, but you can sew between 1/8" and 1/16" from the edge of your frame with a window this size. 


    Attach to Desired Object
    13. Now that you have a beautiful little frame, you'll need to attach it to something in need of organizing!  You can attach by stitching into place by top-stitching (using a running stitch) right over the top of 3 of your outer stitch lines, or you can use glue, again, only on three sides. The open edge will allow you to slip in your tags. On this project I left the top open because the pack will usually be upright. But you could also put them on the side, which on some items may lay nicer.

    NOTE: If gluing, be careful to use just a very thin line of glue along the VERY outer edge, so you will leave space for your label cards. If gluing to fabric, fabric glue, or fusing tape (if your fabric can be ironed) are probably your best bets, but you may want to use something a bit more substantial if you are gluing to paper, wood, plastic or metal. I've never had much luck with fabric glue bonding to anything but fabric, and of course, me. I'm a fan of the newer white and yellow glues: Titebond, Elmer's Glue-All, and Liquid Nails (though this may be overkill! :) always seem to get the job done. Stay away from Gorilla Glue or Super/Krazy Glue for this, as they tend to misbehave a bit with fabric, plus they make a big fat mess.

    Design Designer Labels
    14. Your labels should be slightly smaller than the space within your outer stitching perimeter, but bigger than the window so they don't jump out. I've found a light cardstock or even printable business cards seem to stay put the best. Measure and establish your desired label size, about 1/4" narrower and about a 1/4" shorter than the outer stitched edge should do the trick.

    15.  You can hand write the labels and be done (YAY!), or you can print them using a word-processing or image creator/editor program.

    16.  Cut your labels to fit, slide in, stuff your box, basket, or other receptacle with ONLY what is printed on it.  Harass mercilessly, any individual that does otherwise... or simply reorganize their sock drawer...

    ENJOY!

    The Naptime Gnome


    Crafty Gnome Key:
    1 Crafty Gnome = Simple cutting, gluing, tracing, and/or painting, etc.
    2 Crafty Gnomes = Any of the above, plus the use of a few tools, and may involve a sewing machine for some simple seams... nothing crazy.
    3 Crafty Gnomes = Could require some practice with any of the above items, and/or could involve power tools (you'll meet Burly Gnome soon enough)
    4 Crafty Gnomes = Includes most or all of the above... A bear of a project or requires a bit of help.
    5 Crafty Gnomes = Perhaps a bit sorry I attempted it.